Create your first Profiles project using RudderStack dashboard.
3 minute read
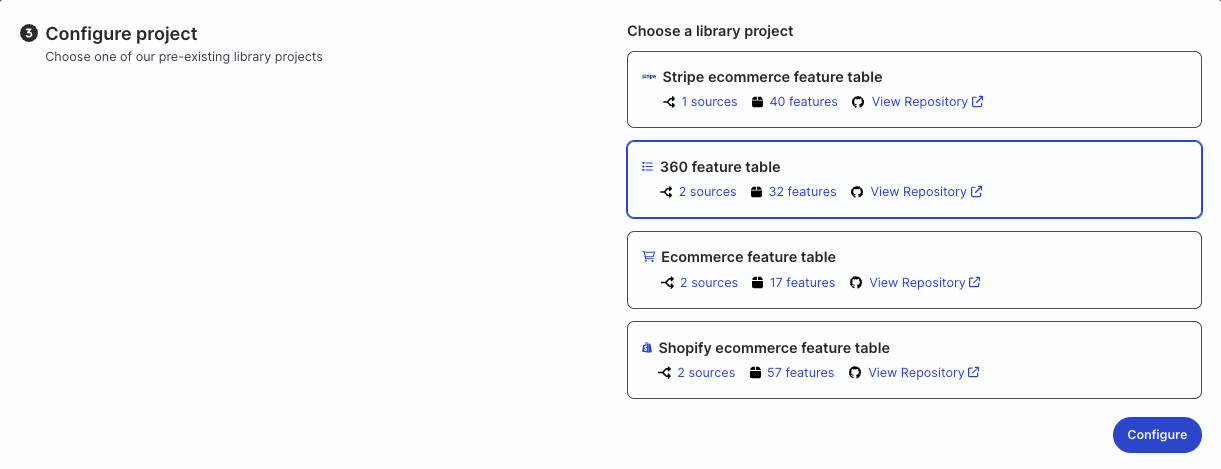
You can create a Profiles project via RudderStack dashboard. It generates outputs based on the pre-defined library projects. However, you can augment these outputs by downloading the Profiles project and updating it manually.
This guide lists the detailed steps to create a Profiles project in the RudderStack dashboard.
Here, you will get a preview of what your data table looks like. Review and ensure its correctness and click Create to create the profile.
7. Add SSH Key to GIT Project (for non-library projects)
If you have added the project URL instead of selecting from a predefined list of library projects, then follow these steps to add a public SSH key to your GIT project:
Open your profile’s GIT repository (on github.com) in your web browser and click the Settings tab.
In the left side bar, select Deploy Keys, then click Add Deploy Key.
Assign a name to it, for example, Sample Profiles Key, and paste the key generated by the RudderStack webapp. You need not check Allow write access.
Click on Add Key.
Using git-tags instead of the latest commit on main branch of projects is recommended.
For example, https://github.com/org-name/lib-name/tag/schema_{{best_schema_version}}.
The selection of compatible git tags is done by PB - it figures the best compatible version for the package. The tool uses the best compatible version of the project in case of any schema updates.
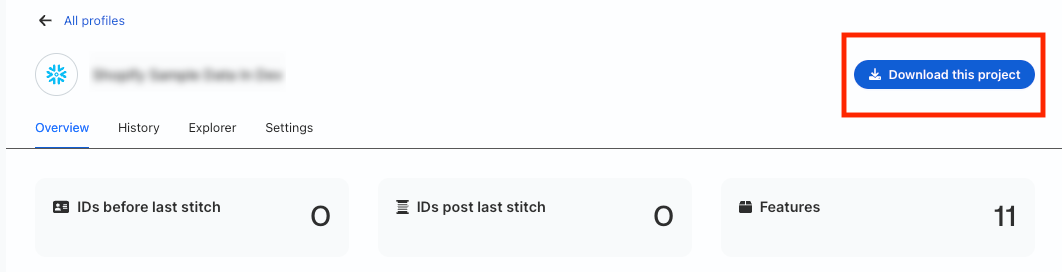
Download project
Once created, you can download the Profiles project locally by clicking Download this project.
The downloaded zipped project contains the pb_project.yaml and models/inputs.yaml files.
Profile details
To view the profile details, click View in the Profiles homepage:
Option
Description
Overview
Lists the features of your Profiles project.
History
Displays the history of Profile runs.
Settings
Displays your profile settings. You can edit them by clicking the edit icon next to each section.
Delete
Deletes your Profiles project.
Note that:
It can take up to thirty minutes for the data preview to show up in your profile’s History tab.
If you keep getting a blank screen, it may be because you do not have sufficient access. Make sure you have a Connections Admin resource role with access to PII. In case the problem persists, contact RudderStack support.
FAQ
When trying to fetch data for a lib project, then data/columns are shown as blank. What should I do?
You’ll need to sync data from a source to a destination. If data is synced from the source you are using and not from some pre-existing tables in the destination, the missing column/data issues should not occur.
I am not able to see Unify tab on the web app though I have admin privileges. What should I do?
This site uses cookies to improve your experience while you navigate through the website. Out of
these
cookies, the cookies that are categorized as necessary are stored on your browser as they are as
essential
for the working of basic functionalities of the website. We also use third-party cookies that
help
us
analyze and understand how you use this website. These cookies will be stored in your browser
only
with
your
consent. You also have the option to opt-out of these cookies. But opting out of some of these
cookies
may
have an effect on your browsing experience.
Necessary
Always Enabled
Necessary cookies are absolutely essential for the website to function properly. This
category only includes cookies that ensures basic functionalities and security
features of the website. These cookies do not store any personal information.
This site uses cookies to improve your experience. If you want to
learn more about cookies and why we use them, visit our cookie
policy. We'll assume you're ok with this, but you can opt-out if you wish Cookie Settings.