Map your warehouse columns to destination tables with RudderStack’s Visual Data Mapper functionality.
4 minute read
The Visual Data Mapper (VDM) offers an intuitive UI to map your warehouse columns to specific destination fields. This is useful especially when mapping your warehouse data to custom fields defined in your destination.
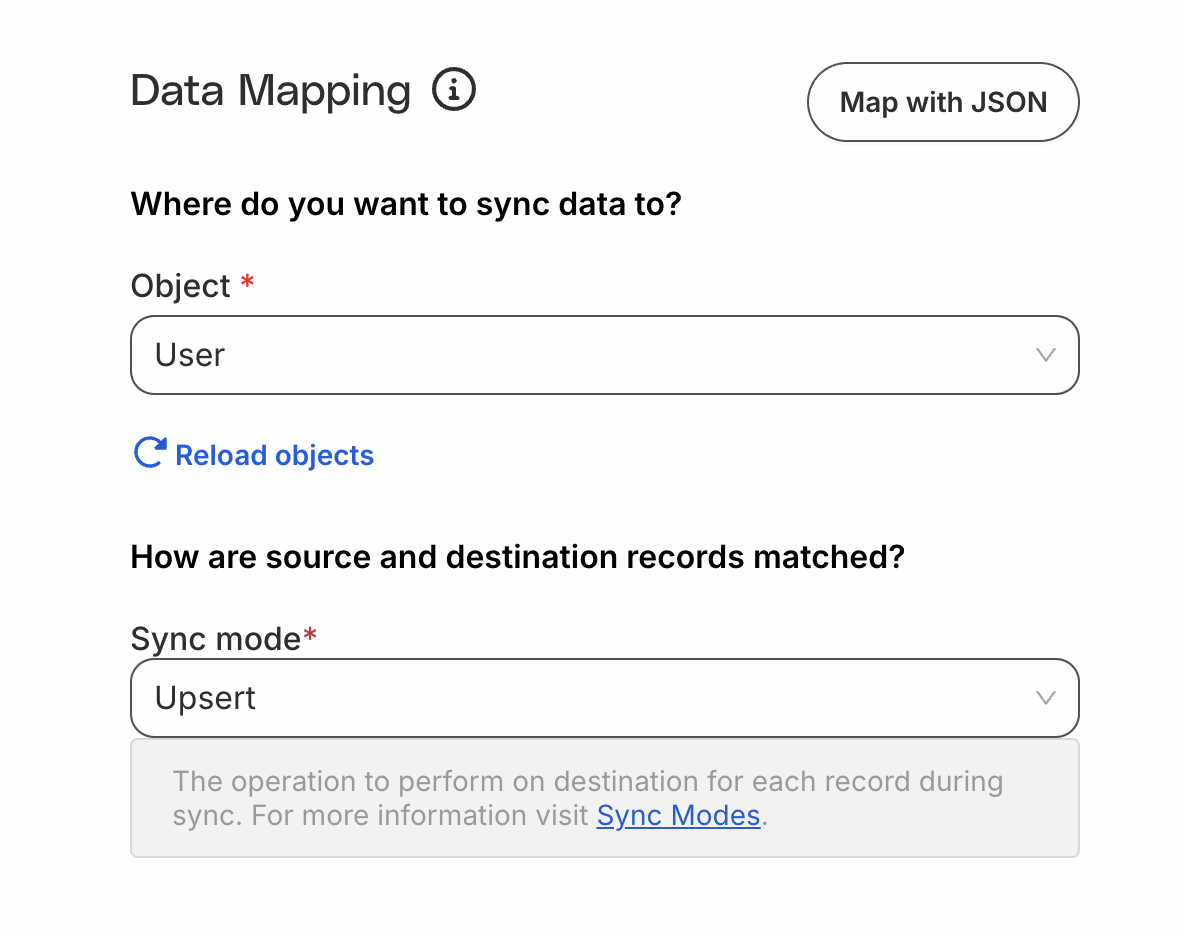
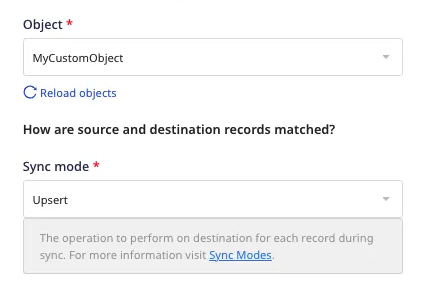
Select the destination Object where you want to sync the data.
Note that:
RudderStack automatically loads all the relevant destination objects. If you have added a new destination object during this configuration process, click Reload objects to get all the latest objects.
RudderStack does not support objects that do not have any fields or a unique user identifier.
Select the sync mode that RudderStack uses to sync your data.
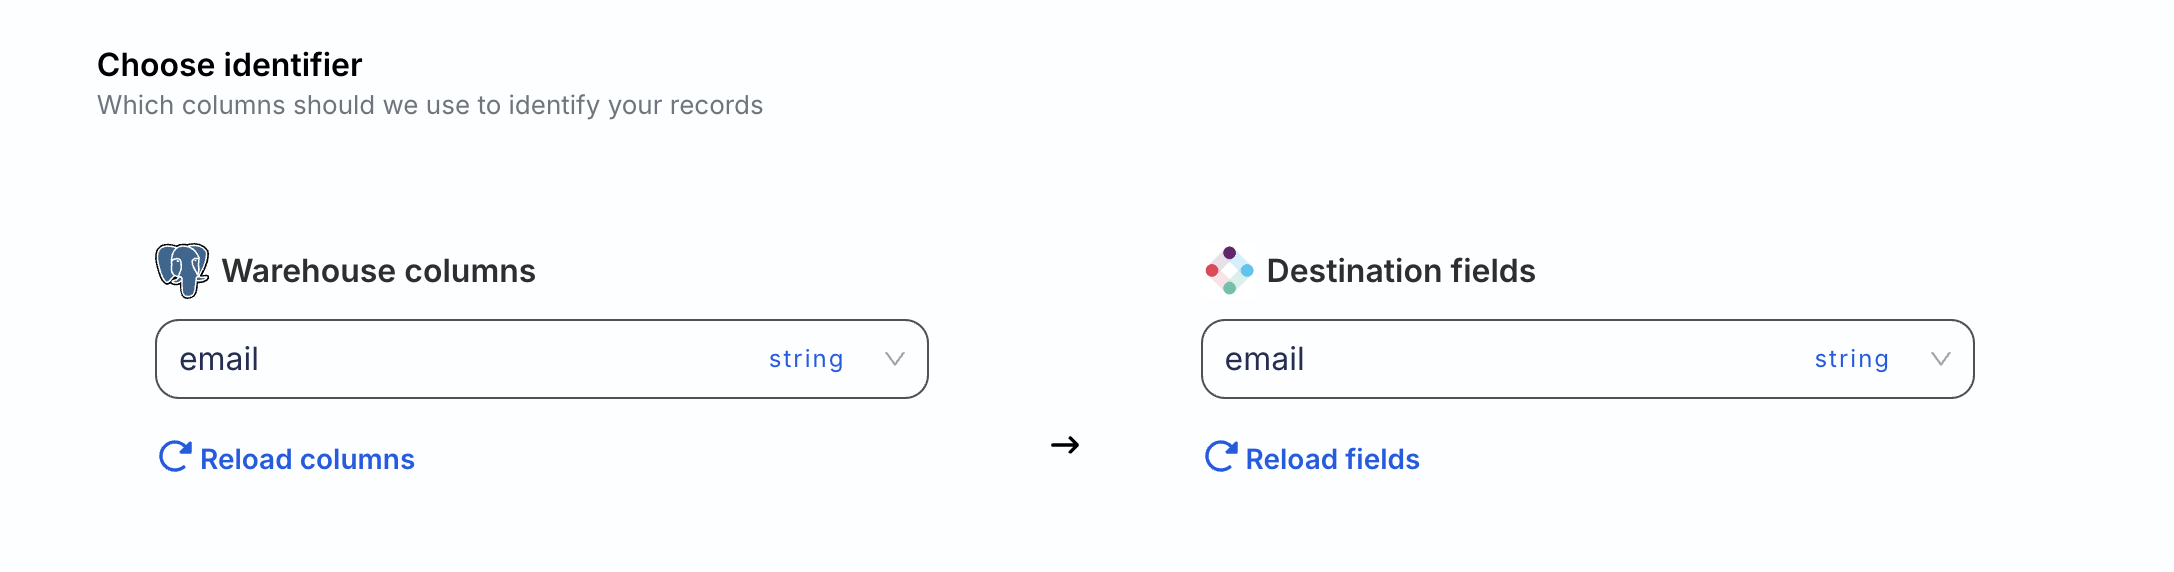
Choose identifier
In the Choose Identifier section, choose a warehouse column and destination field to map your records from the source to the destination. You can choose any column from the dropdown that acts as a unique identifier.
The Choose identifier field must have unique values in order to successfully sync the data to the destination. The records containing duplicate identifier values will not sync.
For example, if you have chosen name as the identifier and it contains more than one values like Alex, the duplicate records will fail to sync.
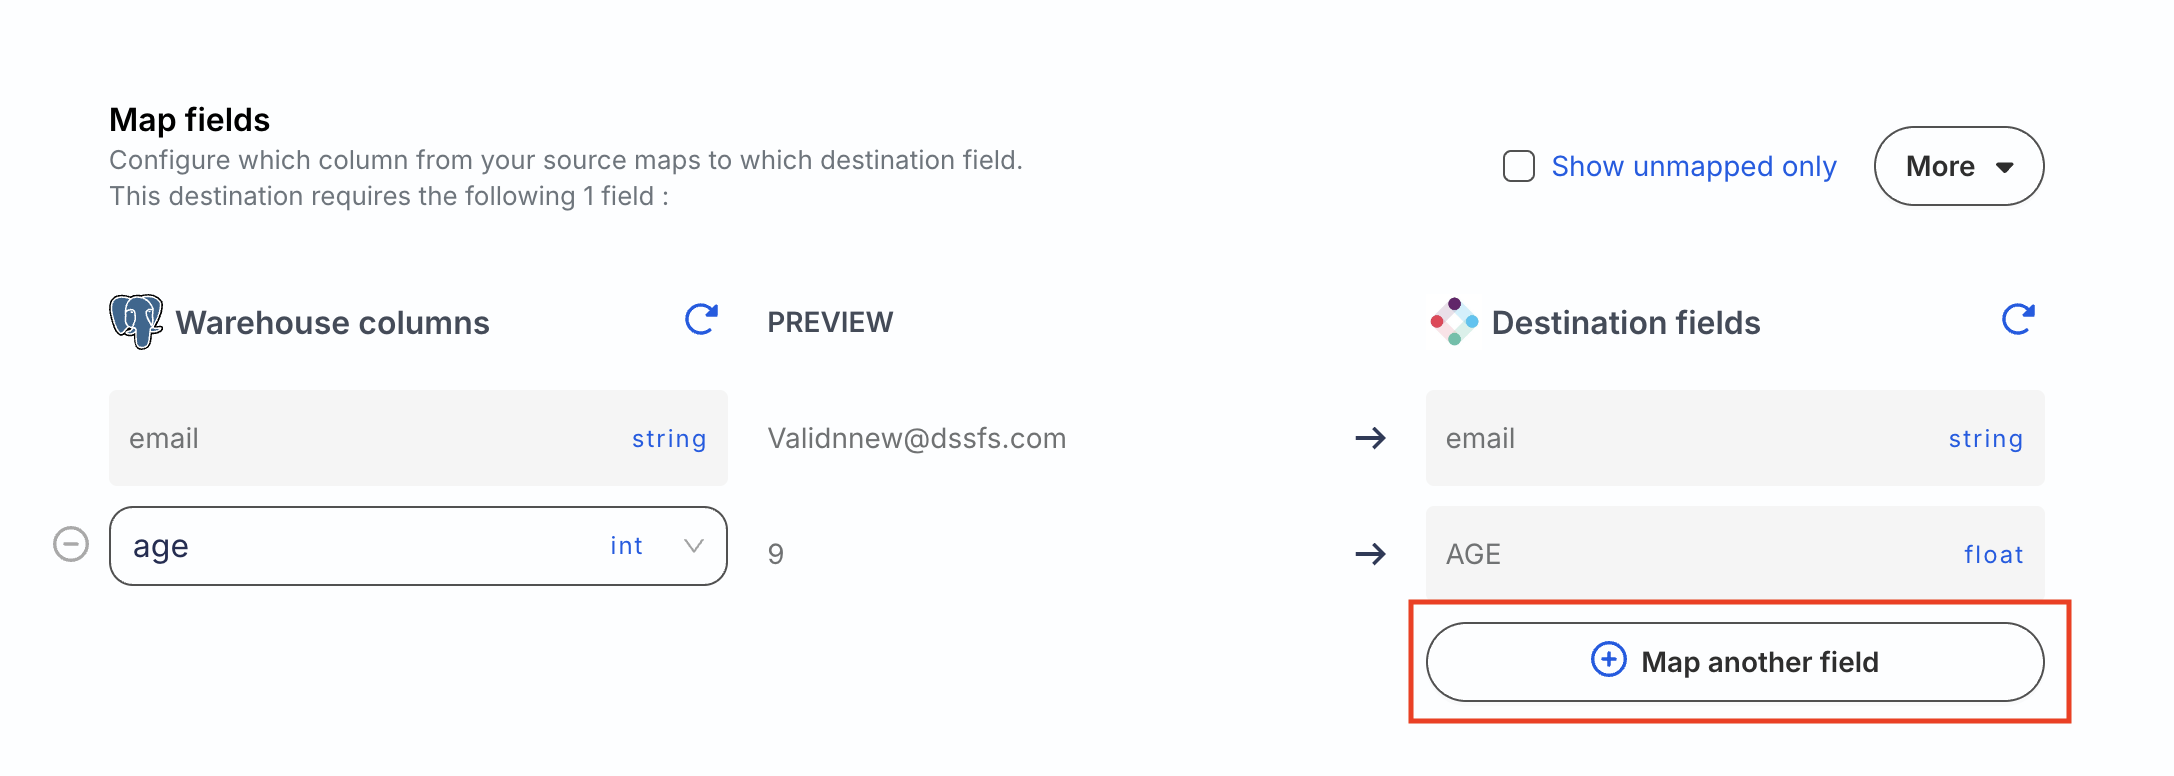
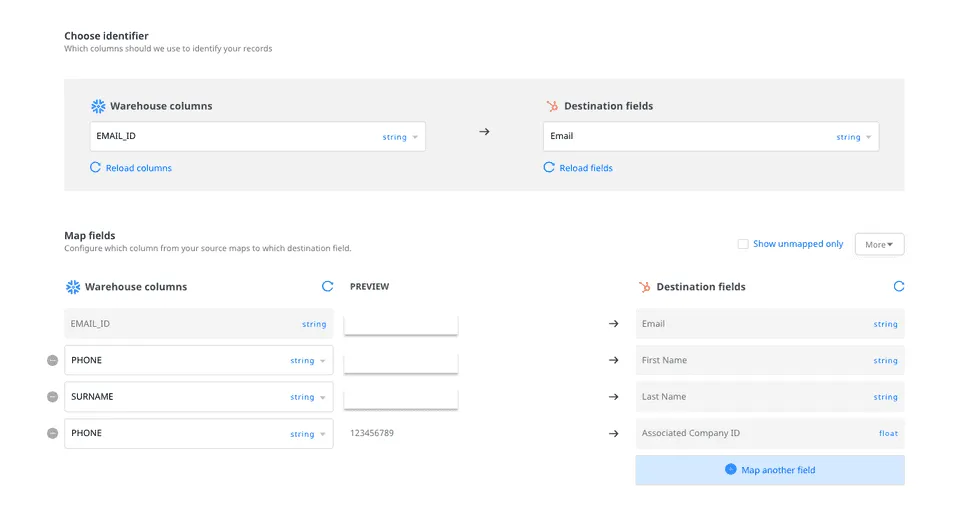
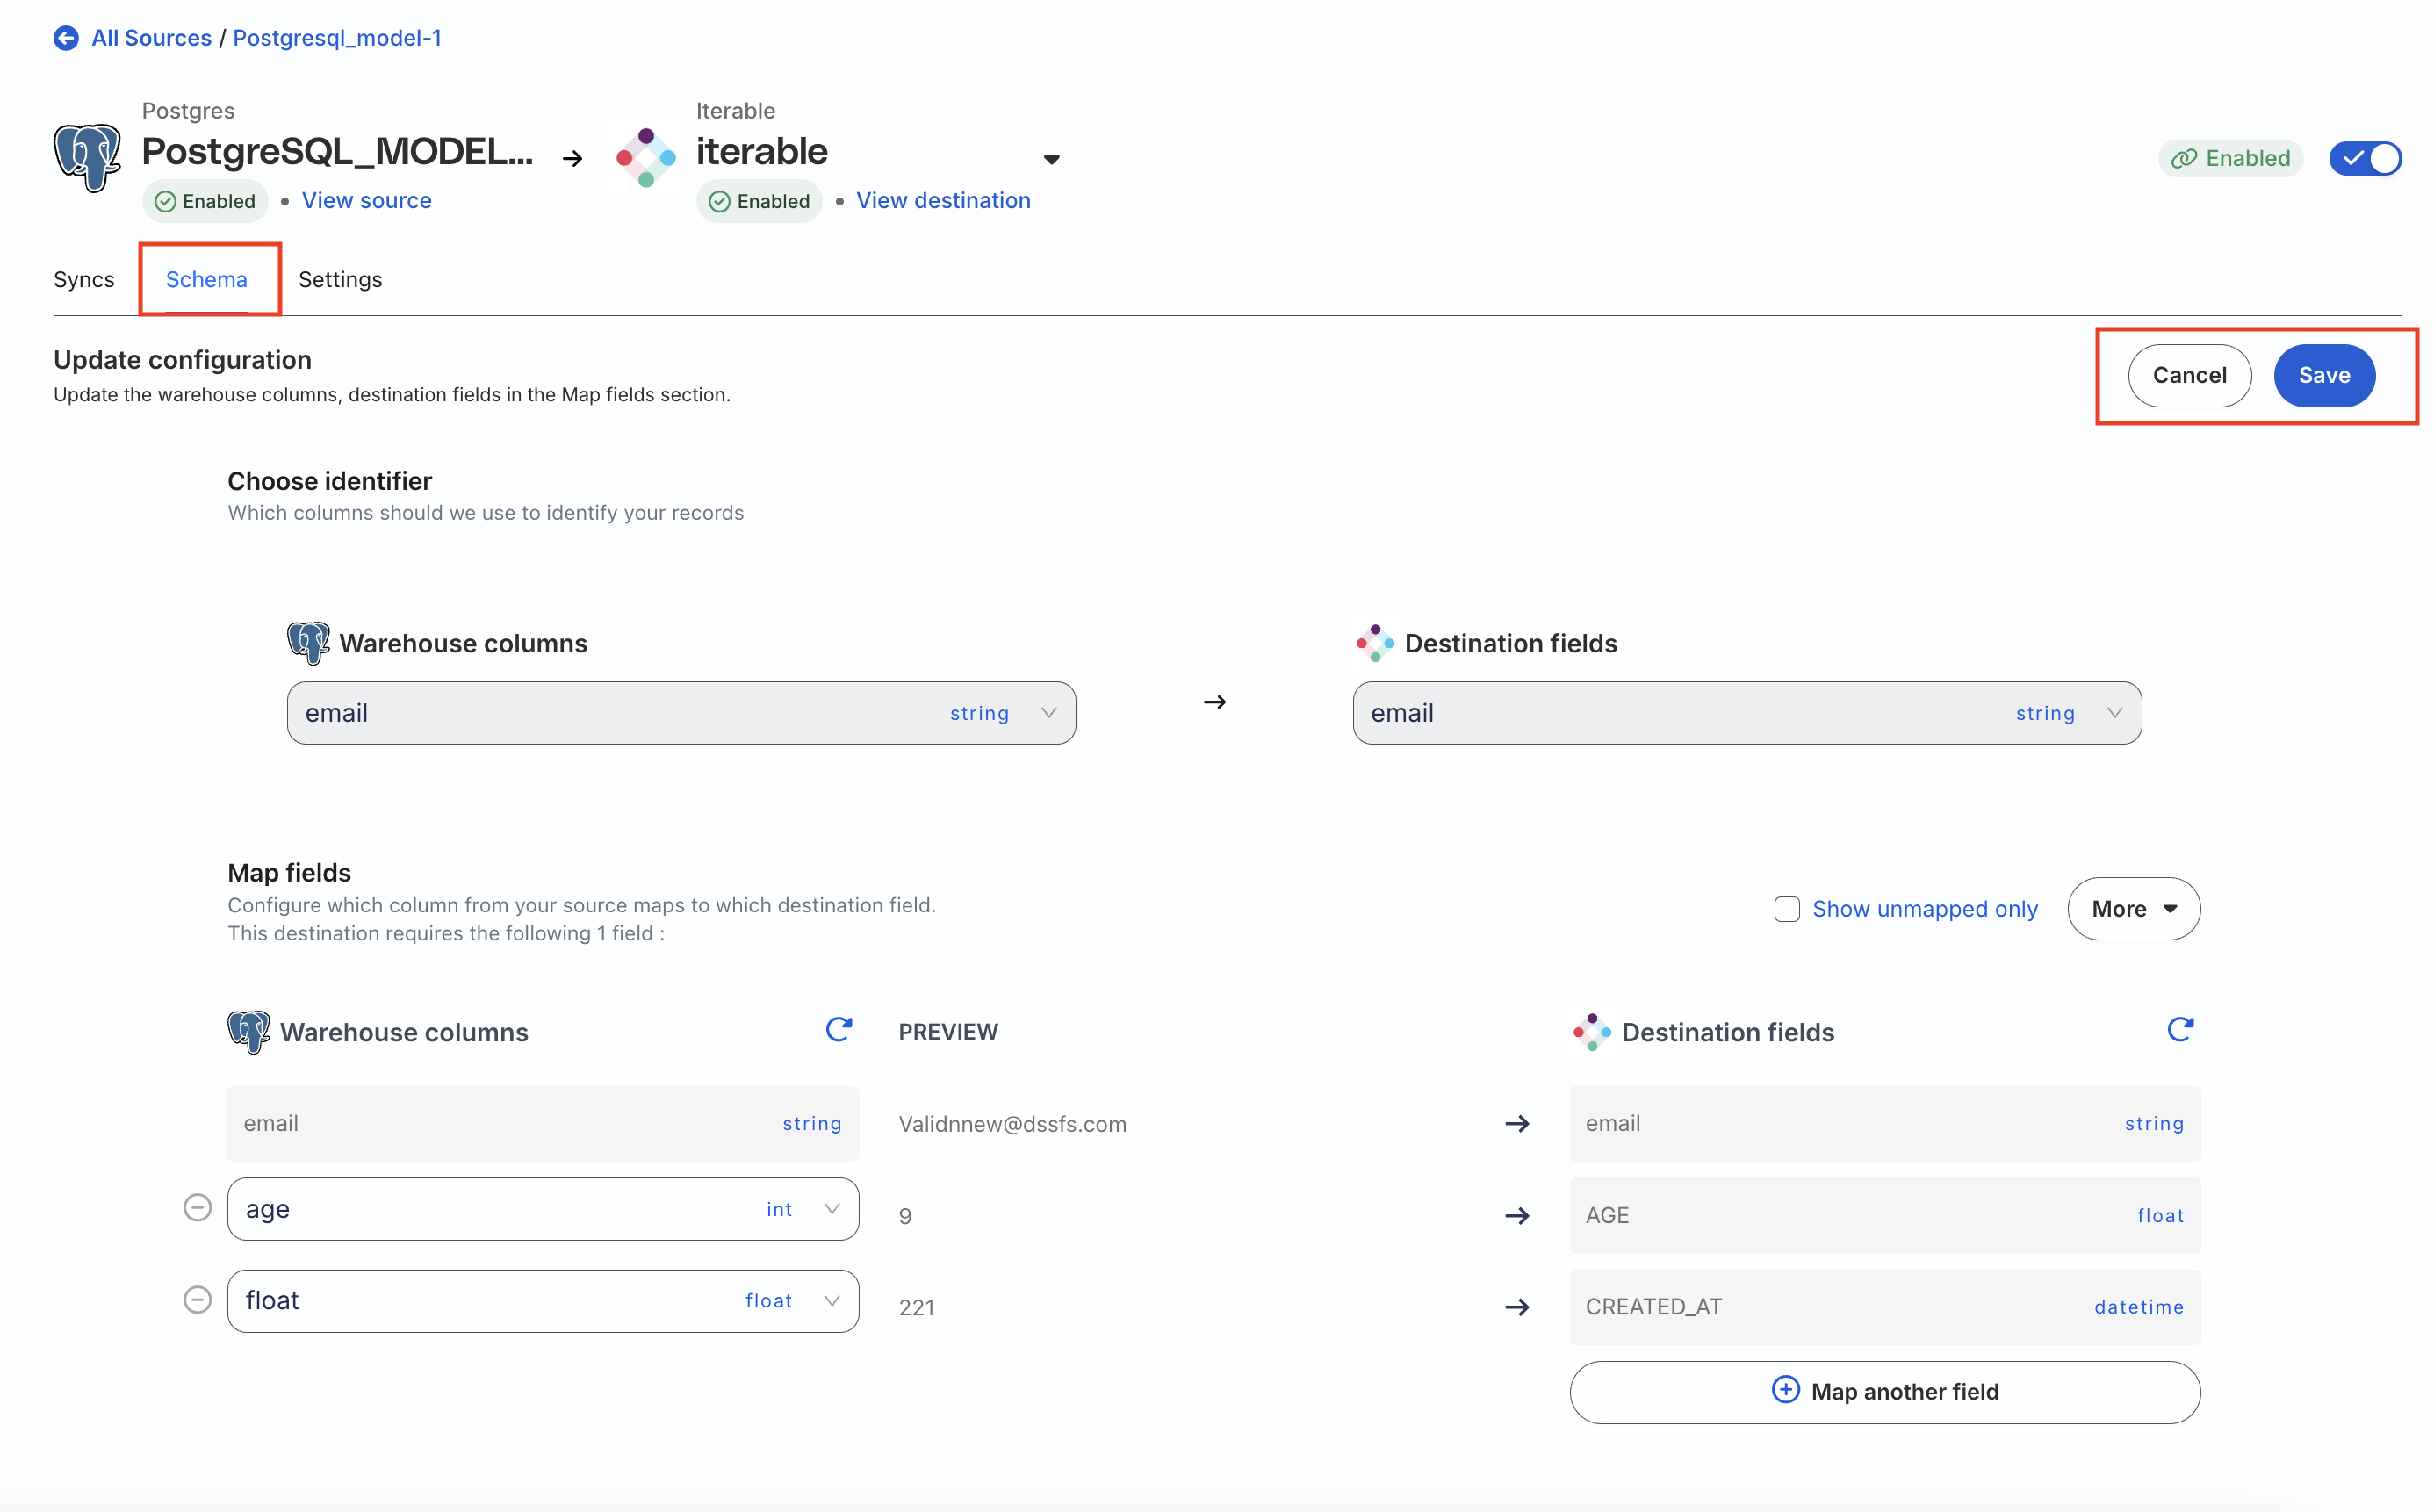
Map fields
In this section, you can configure the specific source-destination field mappings.
Click the Map another field option. Select the Destination field from the dropdown. Then, select the Warehouse column you want to map to this field.
RudderStack gives you full visibility into the name and type of the fields that you are mapping along with a sample preview.
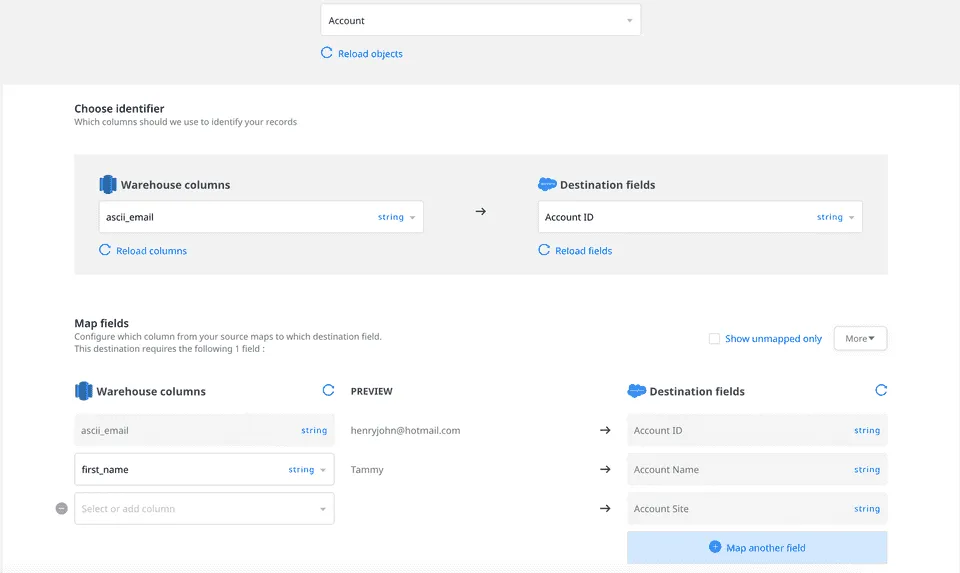
Mandatory mappings
There are some required fields you need to map when sending events to some destination objects. These fields cannot be removed from the mappings.
For example, in the Salesforce Account object, Account Name is a required field, as seen in the following image:
Map fields of different type/format
If you are mapping fields with different data types or formats, you can use the Transformations feature to do the type conversion before sending the data.
In the above example, RudderStack lets you map the warehouse column PHONE of string type to a destination field Associated Company ID of float data type. You can then add a transformation at the destination end to do this type conversion to ensure there is no data type mismatch.
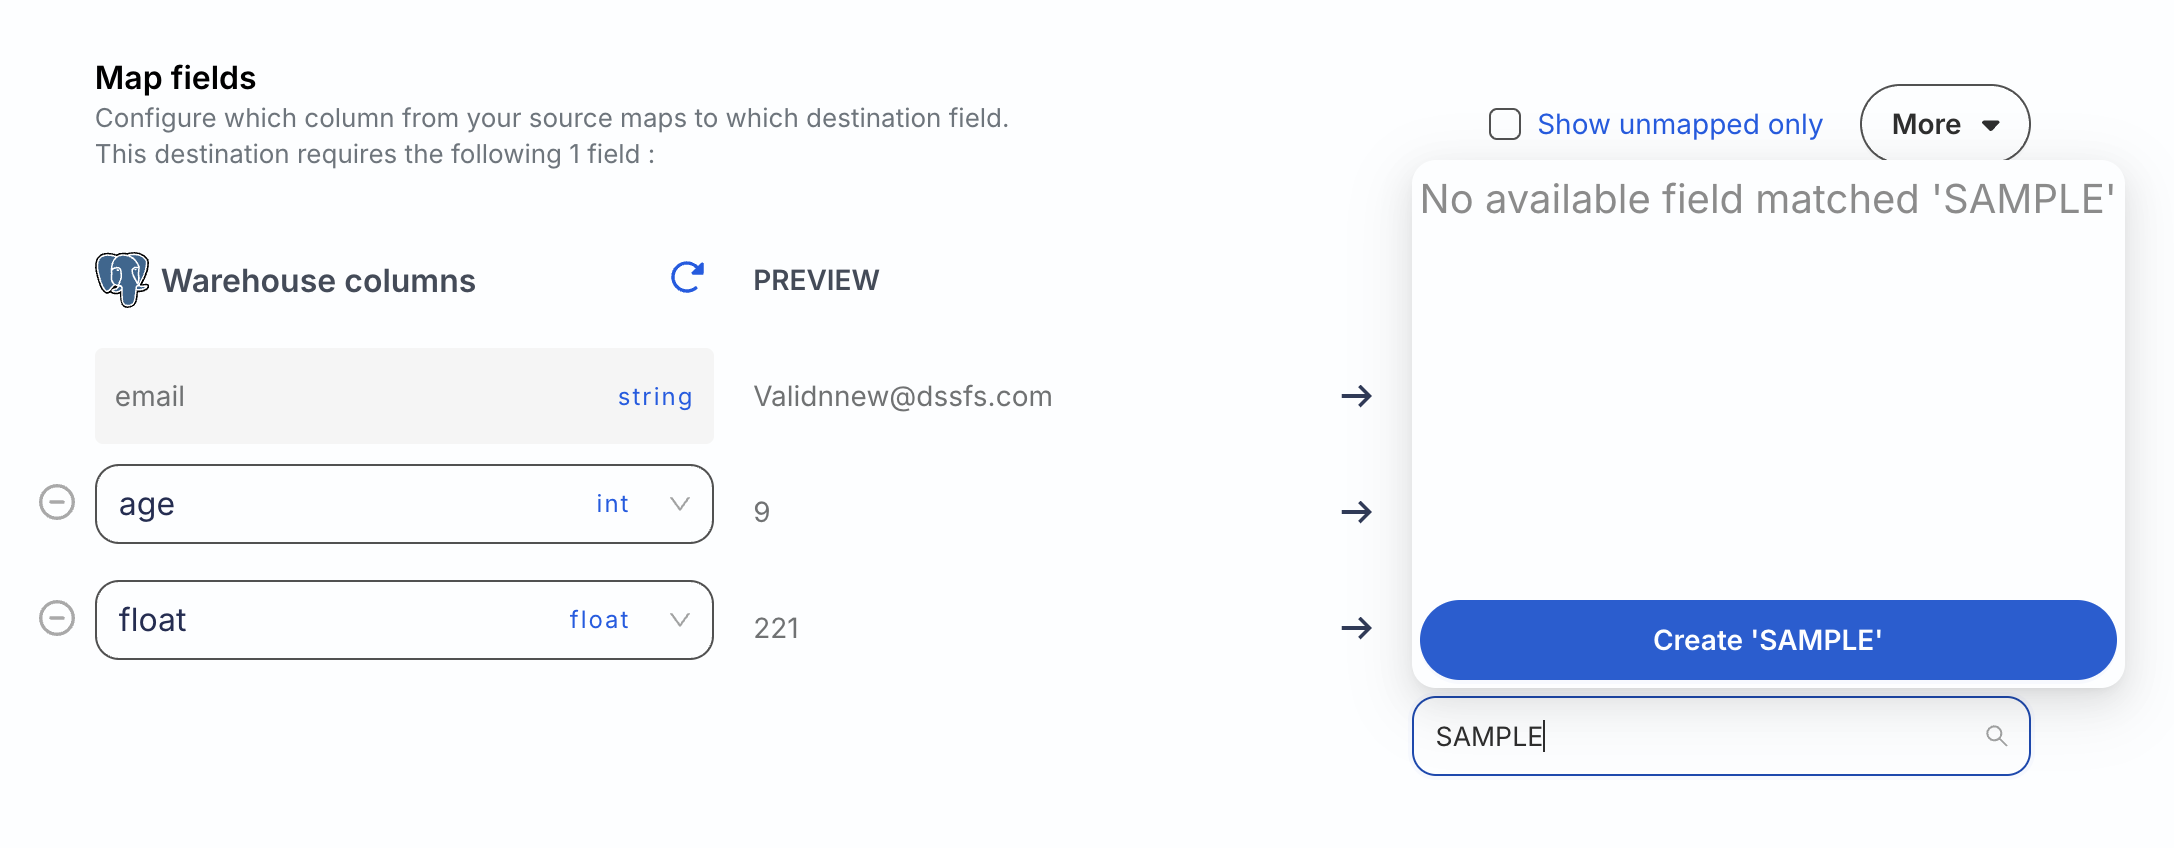
Create custom destination fields
RudderStack lets you create a custom destination field and map it to a warehouse column.
Click the Map another field option.
Enter the name of the custom destination field you want to create.
Click Create.
In some cases, you must create or define the custom fields in the destination before creating them in the RudderStack dashboard.
Sync data to custom Salesforce objects
RudderStack does not support creating new custom fields for the Salesforce destination using the above steps. However, you can still use the Visual Data Mapper to sync your data to custom Salesforce objects by following these steps:
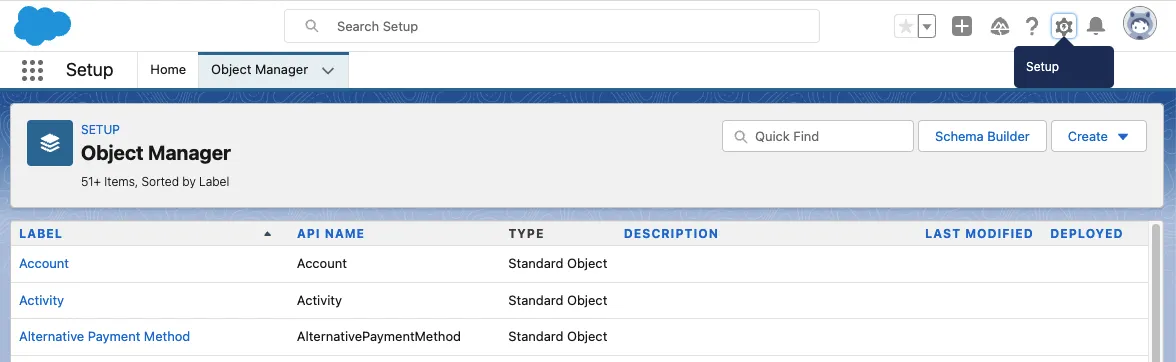
In the top navigation bar, click the Setup icon and go to Object Manager.
Go to Create > Custom Object.
Enter the relevant details and click Save to finish the configuration.
Make sure to select the Allow Search setting under the Search Status section, as seen below. Otherwise, the custom object will not be visible in the RudderStack dashboard.
In your RudderStack dashboard, click Reload objects under the Object field. Your newly created custom object should now be visible in this list. Select the object and map the relevant fields to sync your data.
Update mapping configuration
Note the following:
You can update your mapping configuration irrespective of whether the connection is turned on or off.
While updating the mapping configuration, you cannot change the Object, Sync mode, and Choose identifier fields. You will have to delete the destination and connect a new destination from scratch to do so.
Go to the Schema tab of your Reverse ETL connection page.
This site uses cookies to improve your experience while you navigate through the website. Out of
these
cookies, the cookies that are categorized as necessary are stored on your browser as they are as
essential
for the working of basic functionalities of the website. We also use third-party cookies that
help
us
analyze and understand how you use this website. These cookies will be stored in your browser
only
with
your
consent. You also have the option to opt-out of these cookies. But opting out of some of these
cookies
may
have an effect on your browsing experience.
Necessary
Always Enabled
Necessary cookies are absolutely essential for the website to function properly. This
category only includes cookies that ensures basic functionalities and security
features of the website. These cookies do not store any personal information.
This site uses cookies to improve your experience. If you want to
learn more about cookies and why we use them, visit our cookie
policy. We'll assume you're ok with this, but you can opt-out if you wish Cookie Settings.