Amazon S3 Destination
9 minute read
Amazon S3 (Simple Storage Service) is a cloud-based object storage service that lets customers and businesses store their data securely and at scale.
Find the open source transformer code for this destination in the GitHub repository.
Prerequisites
- Make sure to set up your S3 bucket with the required permissions.
Setup
- From your RudderStack dashboard, add a source. Then, from the list of destinations, select Amazon S3.
- Assign a name to the destination and click Continue.
Connection settings
If you have already configured the AWS credentials in your RudderStack setup via environment credentials or by following the steps in the Permissions setup section, then specifying only S3 Bucket Name and Prefix (optional but recommended) is sufficient to set up your S3 destination.
| Setting | Description |
|---|---|
| S3 Bucket Name | Enter your S3 bucket name. |
| Prefix | If specified, RudderStack creates a folder in the S3 bucket with this name and pushes all data within that folder. For example, s3://<bucket_name>/<prefix>/. |
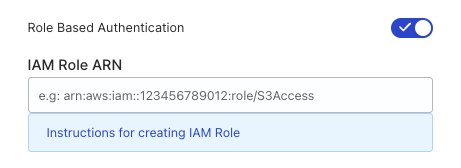
| Role-based Authentication | This setting is toggled on by default and lets you use the RudderStack IAM role for authentication. |
| IAM Role ARN | This setting is visible if Role-based Authentication is toggled on. Enter the ARN of the IAM role in this field. |
| Enable Server Side Encryption | When you enable this setting, RudderStack adds a header x-amz-server-side-encryption with the value AES256 to the PutObject request when sending the data to the S3 bucket.See Encryption with S3 managed keys for more information. |
You will see the following settings if Role-based Authentication is toggled off:
| Setting | Description |
|---|---|
| AWS Access Key ID | Enter the AWS access key ID to authorize RudderStack to write to your S3 bucket. |
| AWS Secret Access Key | Enter the secret access key corresponding to the Access Key ID. |
See the Permissions section more information on obtaining the AWS Access Key ID and AWS Secret Access Key values.
Note the following:
- RudderStack recommends using Role-based Authentication as the access keys-based authentication method is deprecated and will be discontinued soon.
- In both the role-based and access key-based authentication methods, you need to set a policy specifying the required permissions for RudderStack to write to your S3 bucket.
- If you are using your S3 bucket as an intermediary object storage for sending events to a warehouse destination, then see the S3 permissions for warehouse destinations.
Consent management settings
| Setting | Description |
|---|---|
| Consent management settings | Configure the consent management settings for the specified source by choosing the Consent management provider from the dropdown and entering the relevant consent category IDs. See Consent Management in RudderStack for more information on this feature. |
S3 bucket setup
- Go to your S3 Management console.
- Create a new bucket. Alternatively, you can choose an existing bucket.
It is recommended to create a new bucket for storing events coming from RudderStack.
Permissions
To send events to S3 successfully, you need to give RudderStack the necessary permissions to write to your bucket. You can choose any of the following approaches based on your company’s security policies and setup preferences:
Option 1: Use RudderStack IAM role
It is highly recommended to use this option for setting up the required S3 bucket permissions.
Use this approach if you are going to set up the S3 destination in RudderStack using Role Based Authentication.
- Create a RudderStack IAM role.
- Use the following S3 permissions policy for creating the role:
{
  "Version": "2012-10-17",
  "Statement": [
    {
      "Effect": "Allow",
      "Action": "s3:PutObject",
      "Resource": "arn:aws:s3:::<S3_BUCKET_NAME>/*"
    }
  ]
}
Make sure to replace <S3_BUCKET_NAME> with the actual bucket name.
- After creating the role, note and specify the IAM Role ARN to set up your S3 destination.
Option 2: Create IAM user and provide credentials
Note that:
- Using Role-based Authentication (Option 1) is highly recommended as this method is now deprecated and will be discontinued soon.
- AWS does not recommend access key credentials-based authentication.
Use this approach to set up the S3 destination in RudderStack using Access Key Based Authentication.
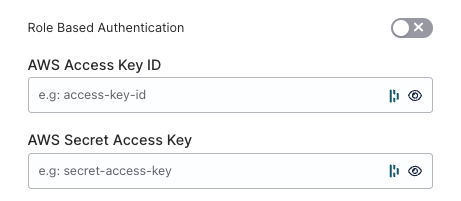
If the AWS credentials are already configured on your instance (see Option 4) where the RudderStack server is set up, you do not need to specify these credentials.
- Log in to your Amazon AWS IAM Console.
- Create an IAM user. Choose a policy that has write access to your bucket. Alternatively, you can create a new policy with the following permissions and attach it to the IAM user:
{
  "Version": "2012-10-17",
  "Statement": [
    {
      "Effect": "Allow",
      "Action": "s3:PutObject",
      "Resource": "arn:aws:s3:::<S3_BUCKET_NAME>/*"
    }
  ]
}
Make sure to replace <S3_BUCKET_NAME> with the actual bucket name.
- Return to the IAM dashboard and go to Users under Access management. Then, click on the newly-created user.
- Go to the Security credentials tab and scroll down to Access keys.
- Click Create access key, select the use case as per your requirement, and click Next.
- If required, set the Description tag value, and click Create access key.
- Note and secure the Access key and Secret access key. Use these credentials to set up your S3 destination in RudderStack.
Option 3: Self-hosted RudderStack
Use this approach only if you are hosting RudderStack in your own instance and don’t want to follow the above options.
- Create a new IAM user and attach the below policy:
{
  "Version": "2012-10-17",
  "Statement": [
    {
      "Effect": "Allow",
      "Action": "*",
      "Resource": "arn:aws:s3:::*"
    }
  ]
}- Add the following policy to your bucket. Replace
ACCOUNT_ID,USER_ARN, and<S3_BUCKET_NAME>with the AWS account ID, user ARN, and the S3 bucket name.
{
  "Version": "2012-10-17",
  "Statement": [
    {
      "Effect": "Allow",
      "Principal": {
        "AWS": "arn:aws:iam::ACCOUNT_ID:user/USER_ARN"
      },
      "Action": ["s3:PutObject", "s3:PutObjectAcl"],
      "Resource": ["arn:aws:s3:::<S3_BUCKET_NAME>/*"]
    }
  ]
}
If you’re using the S3 bucket as an intermediary object storage for a warehouse destination, then see S3 permissions for warehouse destinations for more information on the required bucket policy.
- Return to the IAM dashboard and go to Users under Access management. Then, click on the newly-created user.
- Go to the Security credentials tab and scroll down to Access keys.
- Click Create access key, select the use case as per your requirement, and click Next.
- If required, set the Description tag value, and click Create access key.
- Note and secure the Access key and Secret access key.
- Add the above credentials to your RudderStack setup environment:
RUDDER_AWS_S3_COPY_USER_ACCESS_KEY_ID=<access_key_id>
RUDDER_AWS_S3_COPY_USER_ACCESS_KEY=<secret_access_key>
S3 permissions for warehouse destinations
If you’re using your S3 bucket as an intermediary object storage for a warehouse destination, then attach the below permissions policy depending on your use case:
Note that the below policy is applicable only for the below authentication options:
{
  "Version": "2012-10-17",
  "Statement": [{
    "Effect": "Allow",
    "Action": [
      "s3:GetObject",
      "s3:PutObject",
      "s3:PutObjectAcl",
      "s3:ListBucket"
    ],
    "Resource": "arn:aws:s3:::<S3_BUCKET_NAME>/*"
  }]
}
For self-hosted RudderStack (Option 3), use the following bucket policy in Step 2:
{
  "Version": "2012-10-17",
  "Statement": [{
    "Effect": "Allow",
    "Principal": {
      "AWS": "arn:aws:iam::ACCOUNT_ID:user/USER_ARN"
    },
    "Action": [
      "s3:GetObject",
      "s3:PutObject",
      "s3:PutObjectAcl",
      "s3:ListBucket"
    ],
    "Resource": ["arn:aws:s3:::<S3_BUCKET_NAME>/*"]
  }]
}
Make sure to replace <S3_BUCKET_NAME> with the actual bucket name.
Encryption
Amazon S3 provides encryption at rest. The objects get encrypted while saving them to the bucket and are decrypted before downloading from S3.
S3 lets you set the default encryption behavior for a bucket. It encrypts the objects using server-side encryption with either Amazon S3 managed keys (SSE-S3) or AWS KMS-managed keys (SSE-KMS).
Set default encryption
- Log in to your S3 Management console and select your bucket.
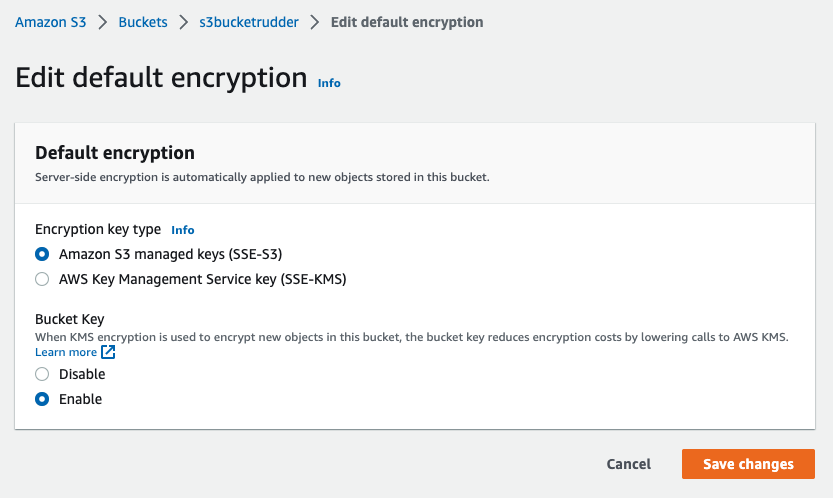
- Go to the Properties tab and scroll down to Default encryption. Then, click Edit.
- Under Encryption key type, choose from Amazon S3 managed keys (SSE-S3) or AWS KMS-managed keys (SSE-KMS):
The following settings are applicable if you choose AWS KMS-managed keys (SSE-KMS) as the encryption key type:
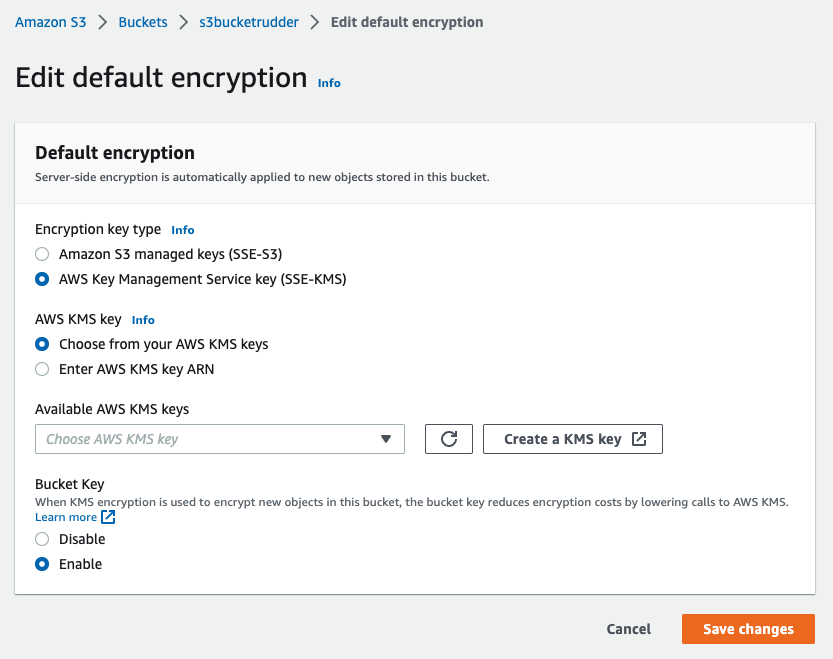
You can choose an existing AWS KMS key, enter the ARN of an AWS KMS key, or create a new KMS key.
- Under Bucket Key, choose Enable and click Save changes.
For more information on setting the default encryption behavior for a bucket, see the S3 documentation.
AWS KMS keys
When the default encryption is set to AWS KMS-managed keys (SSE-KMS), S3 encrypts the objects using the customer managed keys (CMK) when they are uploaded to the bucket.
Create a new customer managed key
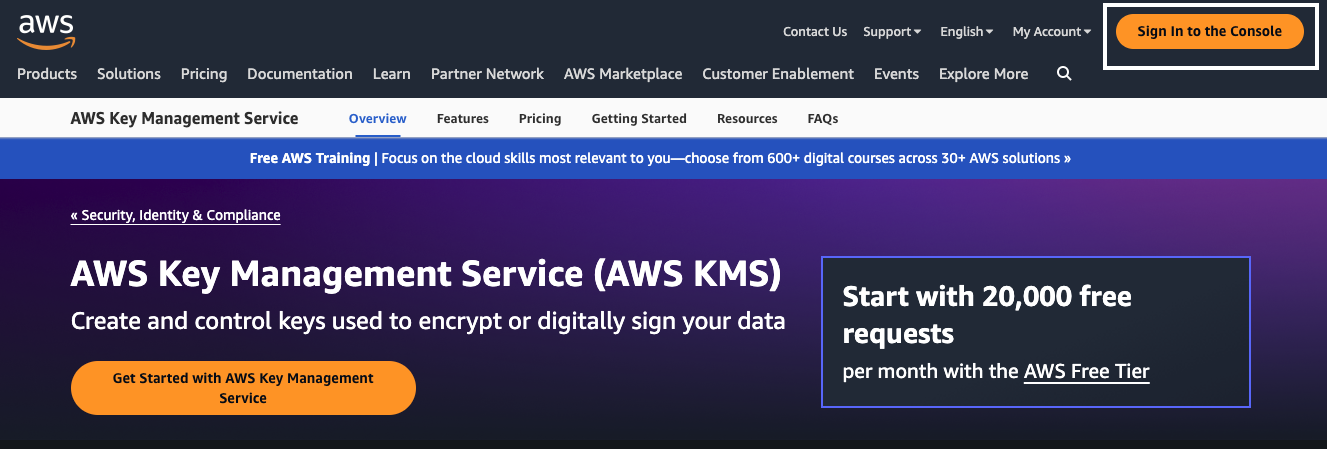
- Log in to the AWS Key Management Service (KMS) console.
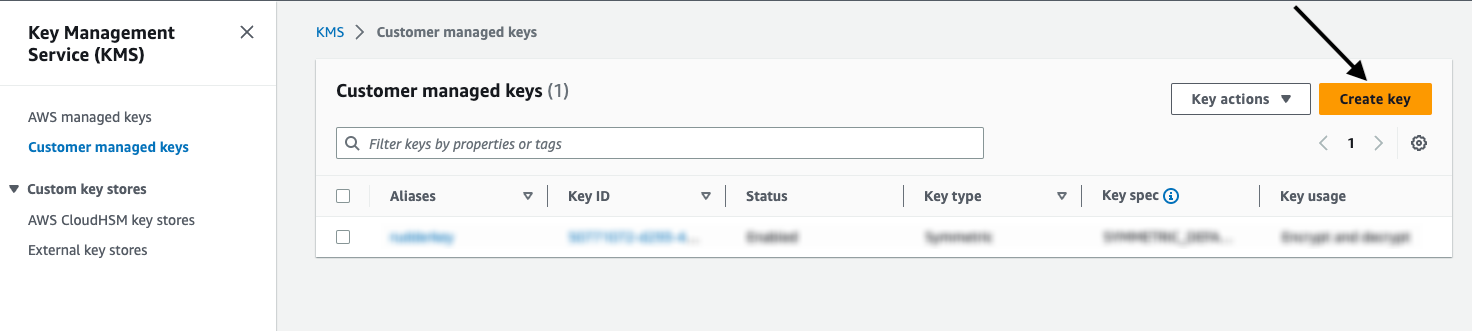
- From the left sidebar, go to Customer managed keys and click Create key.
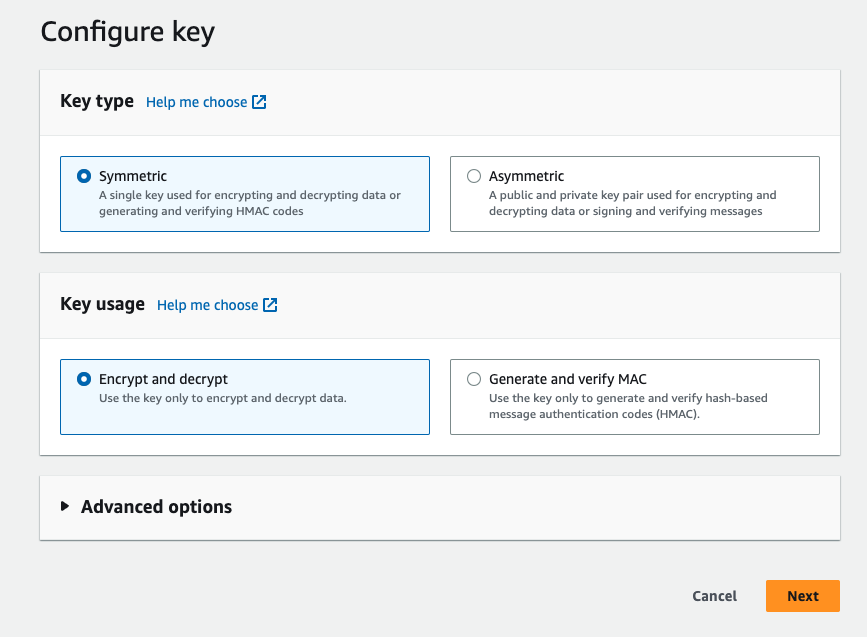
- Under Key type, choose Symmetric. Under Key usage, select Encrypt and decrypt.
S3 supports only symmetric CMKs.
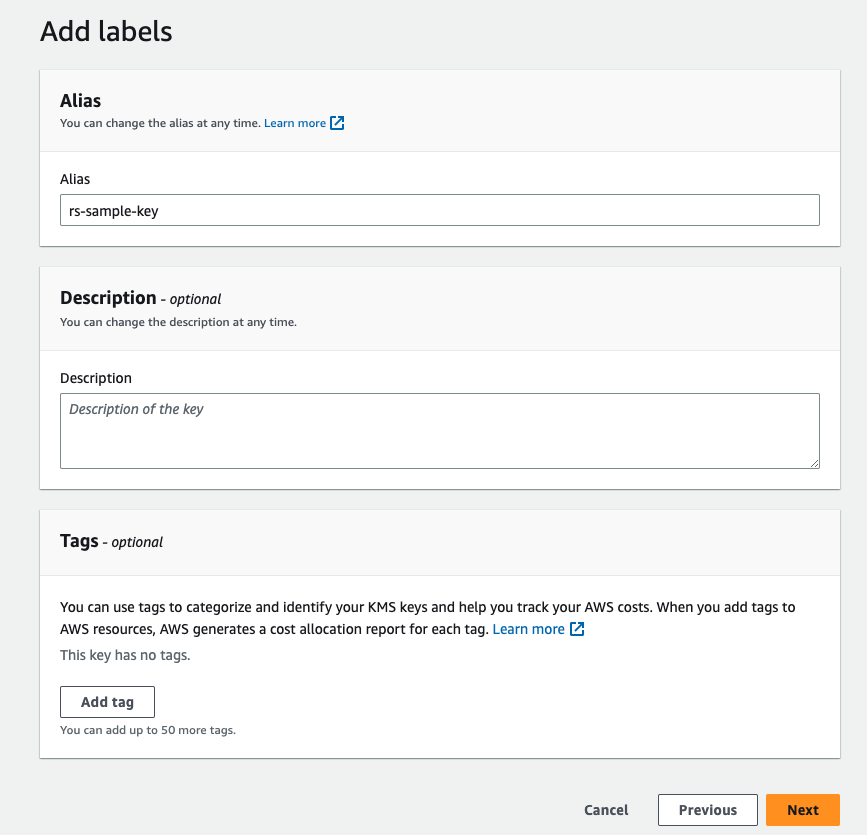
- Set an Alias for the key. You can also add a description or tags for the key as required.
- Choose the IAM user or role who can administer and use this key.
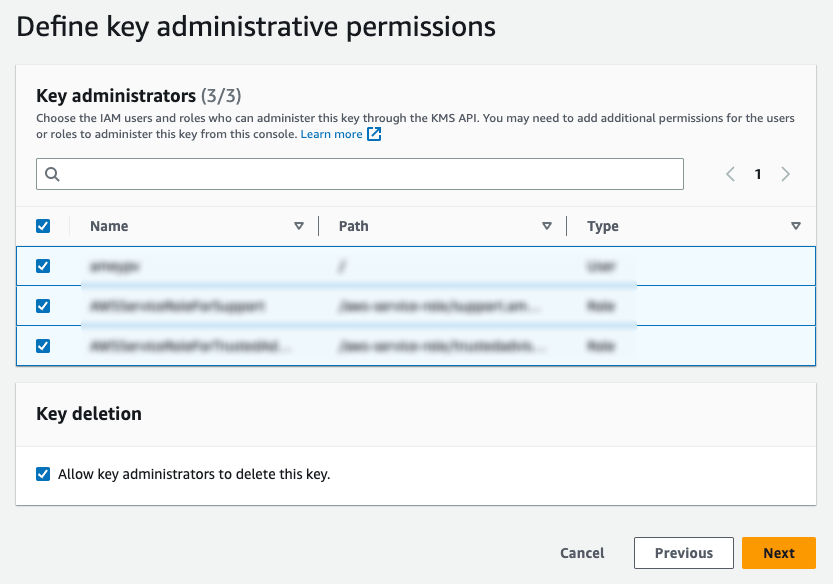
- Review the configuration and click Finish to create the customer managed key.
- Finally, set the default encryption for your S3 bucket as AWS KMS-managed keys (SSE-KMS) and select this customer managed key.
S3 managed keys
When you enable the Enable Server Side Encryption dashboard setting while configuring your S3 destination, RudderStack adds a x-amz-server-side-encryption header with the value AES256 to all the PutObject requests. S3 then encrypts the object with the AES256 encryption algorithm. For more information, see S3 encryption with S3 managed keys.
If you set the default encryption key type to Amazon S3 managed keys (SSE-S3), then S3 encrypts the objects that are uploaded in the bucket with AES256 encryption - irrespective of whether the Enable Server Side Encryption is enabled in the RudderStack dashboard or the presence of thex-amz-server-side-encryptionheader in thePutObjectrequests.
Where RudderStack stores the data
RudderStack stores the data in the S3 bucket in the following format:
rudder-logs/sourceId/date/timestamp.sourceID.uuid.json.gz
In this case:
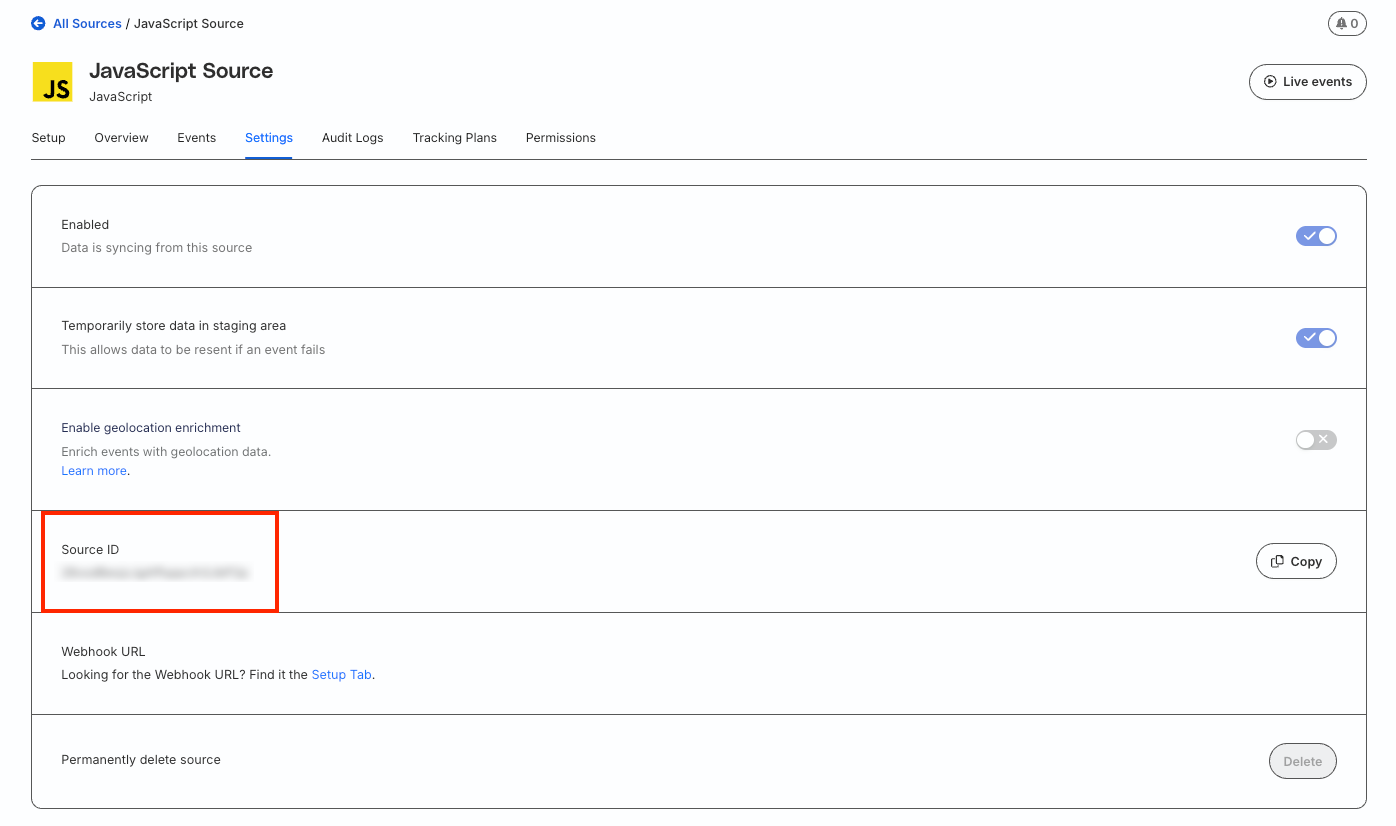
sourceIdcorresponds to the source ID in the RudderStack dashboard. You can find it by going to the Settings tab within your source:
datecorresponds to the upload date.timestampcorresponds to upload timestamp.
Note that the events within the file might not correspond to the same upload date.
For example, events from January 1, 2025 at 23:59 hrs might go into the next day’s file if the upload happens on that day, for example, on January 2, 2025 at 00:02 hrs.
Delete a user
You can delete a user in S3 using the Suppression with Delete regulation of the RudderStack User Suppression API.
While RudderStack forwards the deletion request, it does not guarantee deletion within a 30-day window. You will need to check with Amazon S3 if the request is fulfilled.
To delete a user, specify the userId in the event.A sample regulation request body for deleting a user in S3 is shown below:
{
  "regulationType": "suppress_with_delete",
  "destinationIds": ["2FIKkByqn37FhzczP23eZmURciA"],
  "users": [
    {
      "userId": "1hKOmRA4GRlm",
      "<customKey>": "<customValue>"
    }
  ]
}